Exposure Management
WeaverScan
WeaverScan is ThreatWeaver's administration screen for its built-in scanning fleet: which scanner engine runs your scans, the agents you've deployed, and everything those agents need to scan correctly: credentials, policies, target groups, blackout windows, and per-check overrides.
WeaverScan has several sections, and which ones you see depends on your role and which features your workspace has turned on. If a section described below isn't in your tab bar, your workspace may not have it enabled, or your role may not include access to it.
What it's for
- Choose and configure your scan engine: set which engine (WeaverScan's own native scanner, or an external one) runs your scans by default.
- Deploy and manage scan agents: enroll agents on the hosts you want to scan, and monitor their health from one fleet view.
- Prepare scans to run correctly: save credentials for authenticated scanning, build reusable policies, group targets, and schedule blackout windows when scanning shouldn't happen.
- Fine-tune detection for your environment: suppress a noisy check or change its severity without waiting for a catalog update.
The screens in it
WeaverScan is a single page with a row of tabs across the top.

- Scanner Engines: which engine runs your scans, and its credentials.
- Agent Fleet: the WeaverScan agents you've deployed, and how to install more.
- Enrollment Tokens: the tokens agents use to register for the first time.
- Connectors: integrations with external scanners and security tools.
- Relays, Mobile, Containers: read-only inventories of relay nodes, mobile devices, and containers your agents have reported.
- Credentials, Policies, Target Groups, Blackout Windows, Report Settings: building blocks used when configuring and running a scan.
- Tenant Overrides: per-workspace adjustments to individual detection checks.
Scanner Engines
Choose which engine actually performs your scans, and enter credentials for any engine besides WeaverScan's own built-in one.
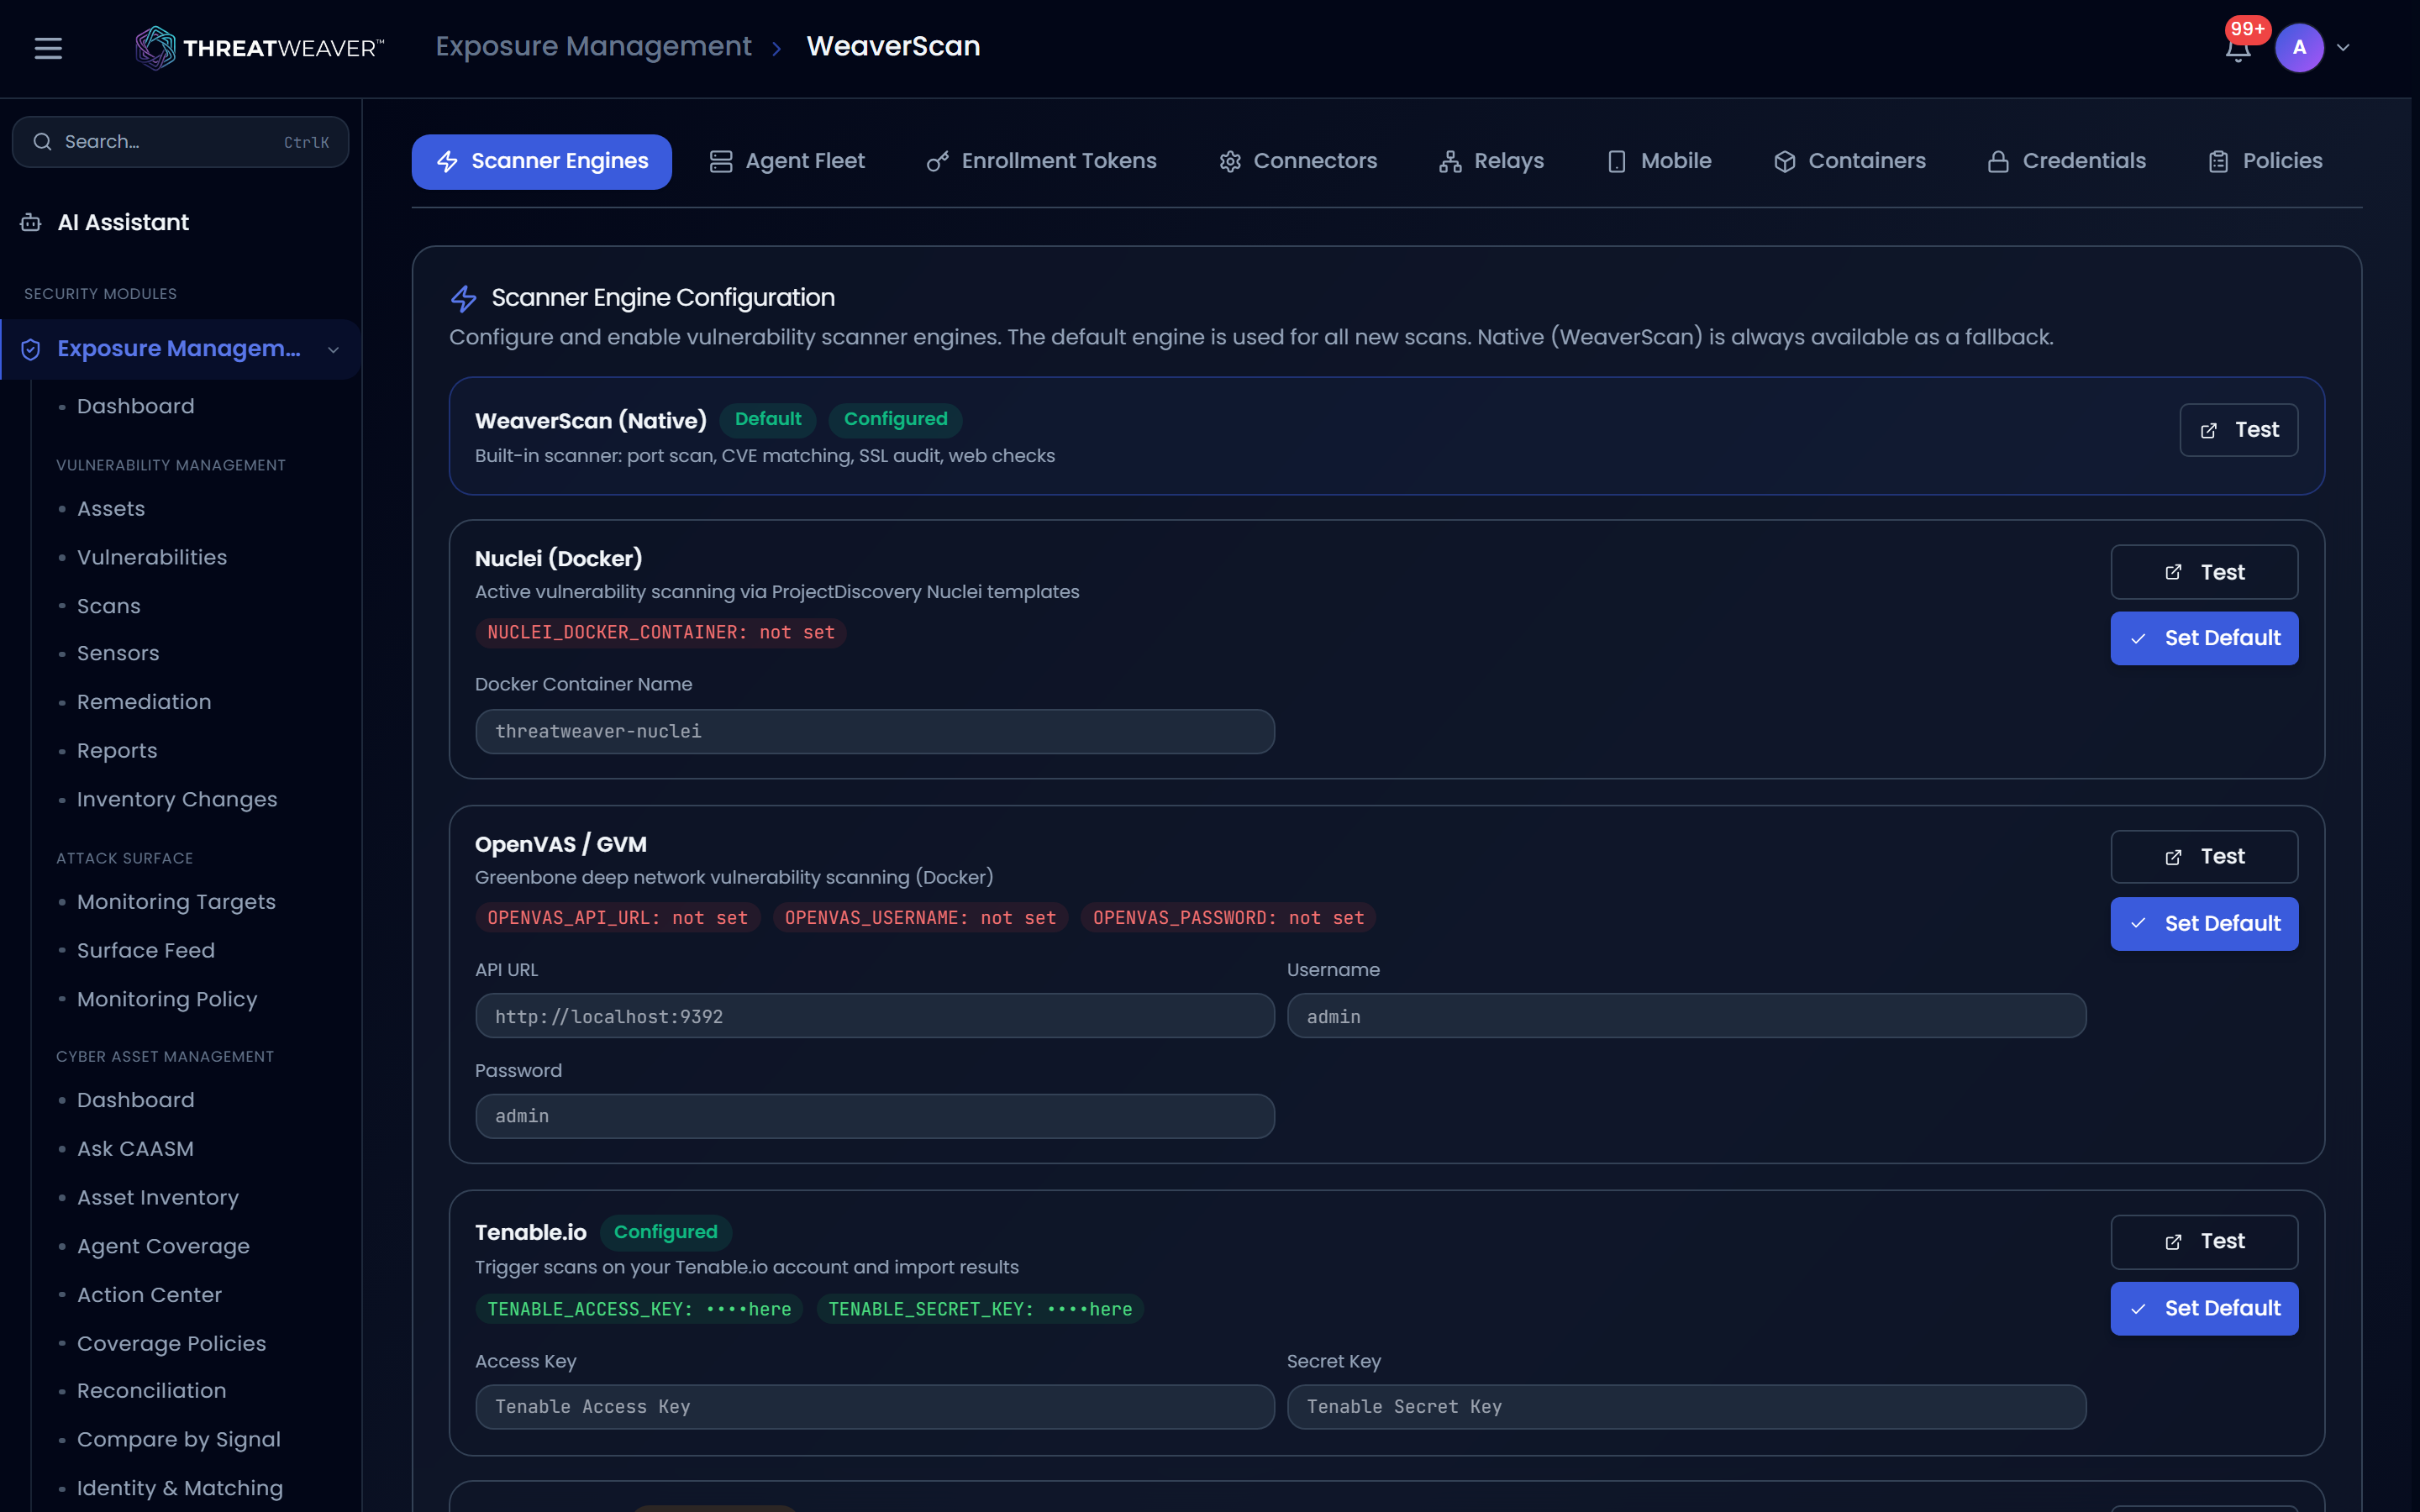
Each supported engine (WeaverScan Native, Tenable, Qualys, Rapid7, OpenVAS, and Nuclei) has a card showing a Default badge if it's the active engine, and a Configured or Not Configured badge for engines that need credentials. WeaverScan Native is always available as a fallback and needs no setup.
| Control | What it does |
|---|---|
| Credential fields | Enter the connection details an external engine needs (for example an access key and secret, or a username, password, and API URL). |
| Save | Stores the credentials you've entered for that engine. |
| Test | Checks the credentials against the engine and shows whether the connection succeeded. |
| Set Default | Makes this engine the one used for new scans. For any engine besides WeaverScan Native, you must pass a connection test first. |
Agent Fleet
The main screen for installing and monitoring WeaverScan scan agents, the lightweight programs you run on the hosts you want scanned.
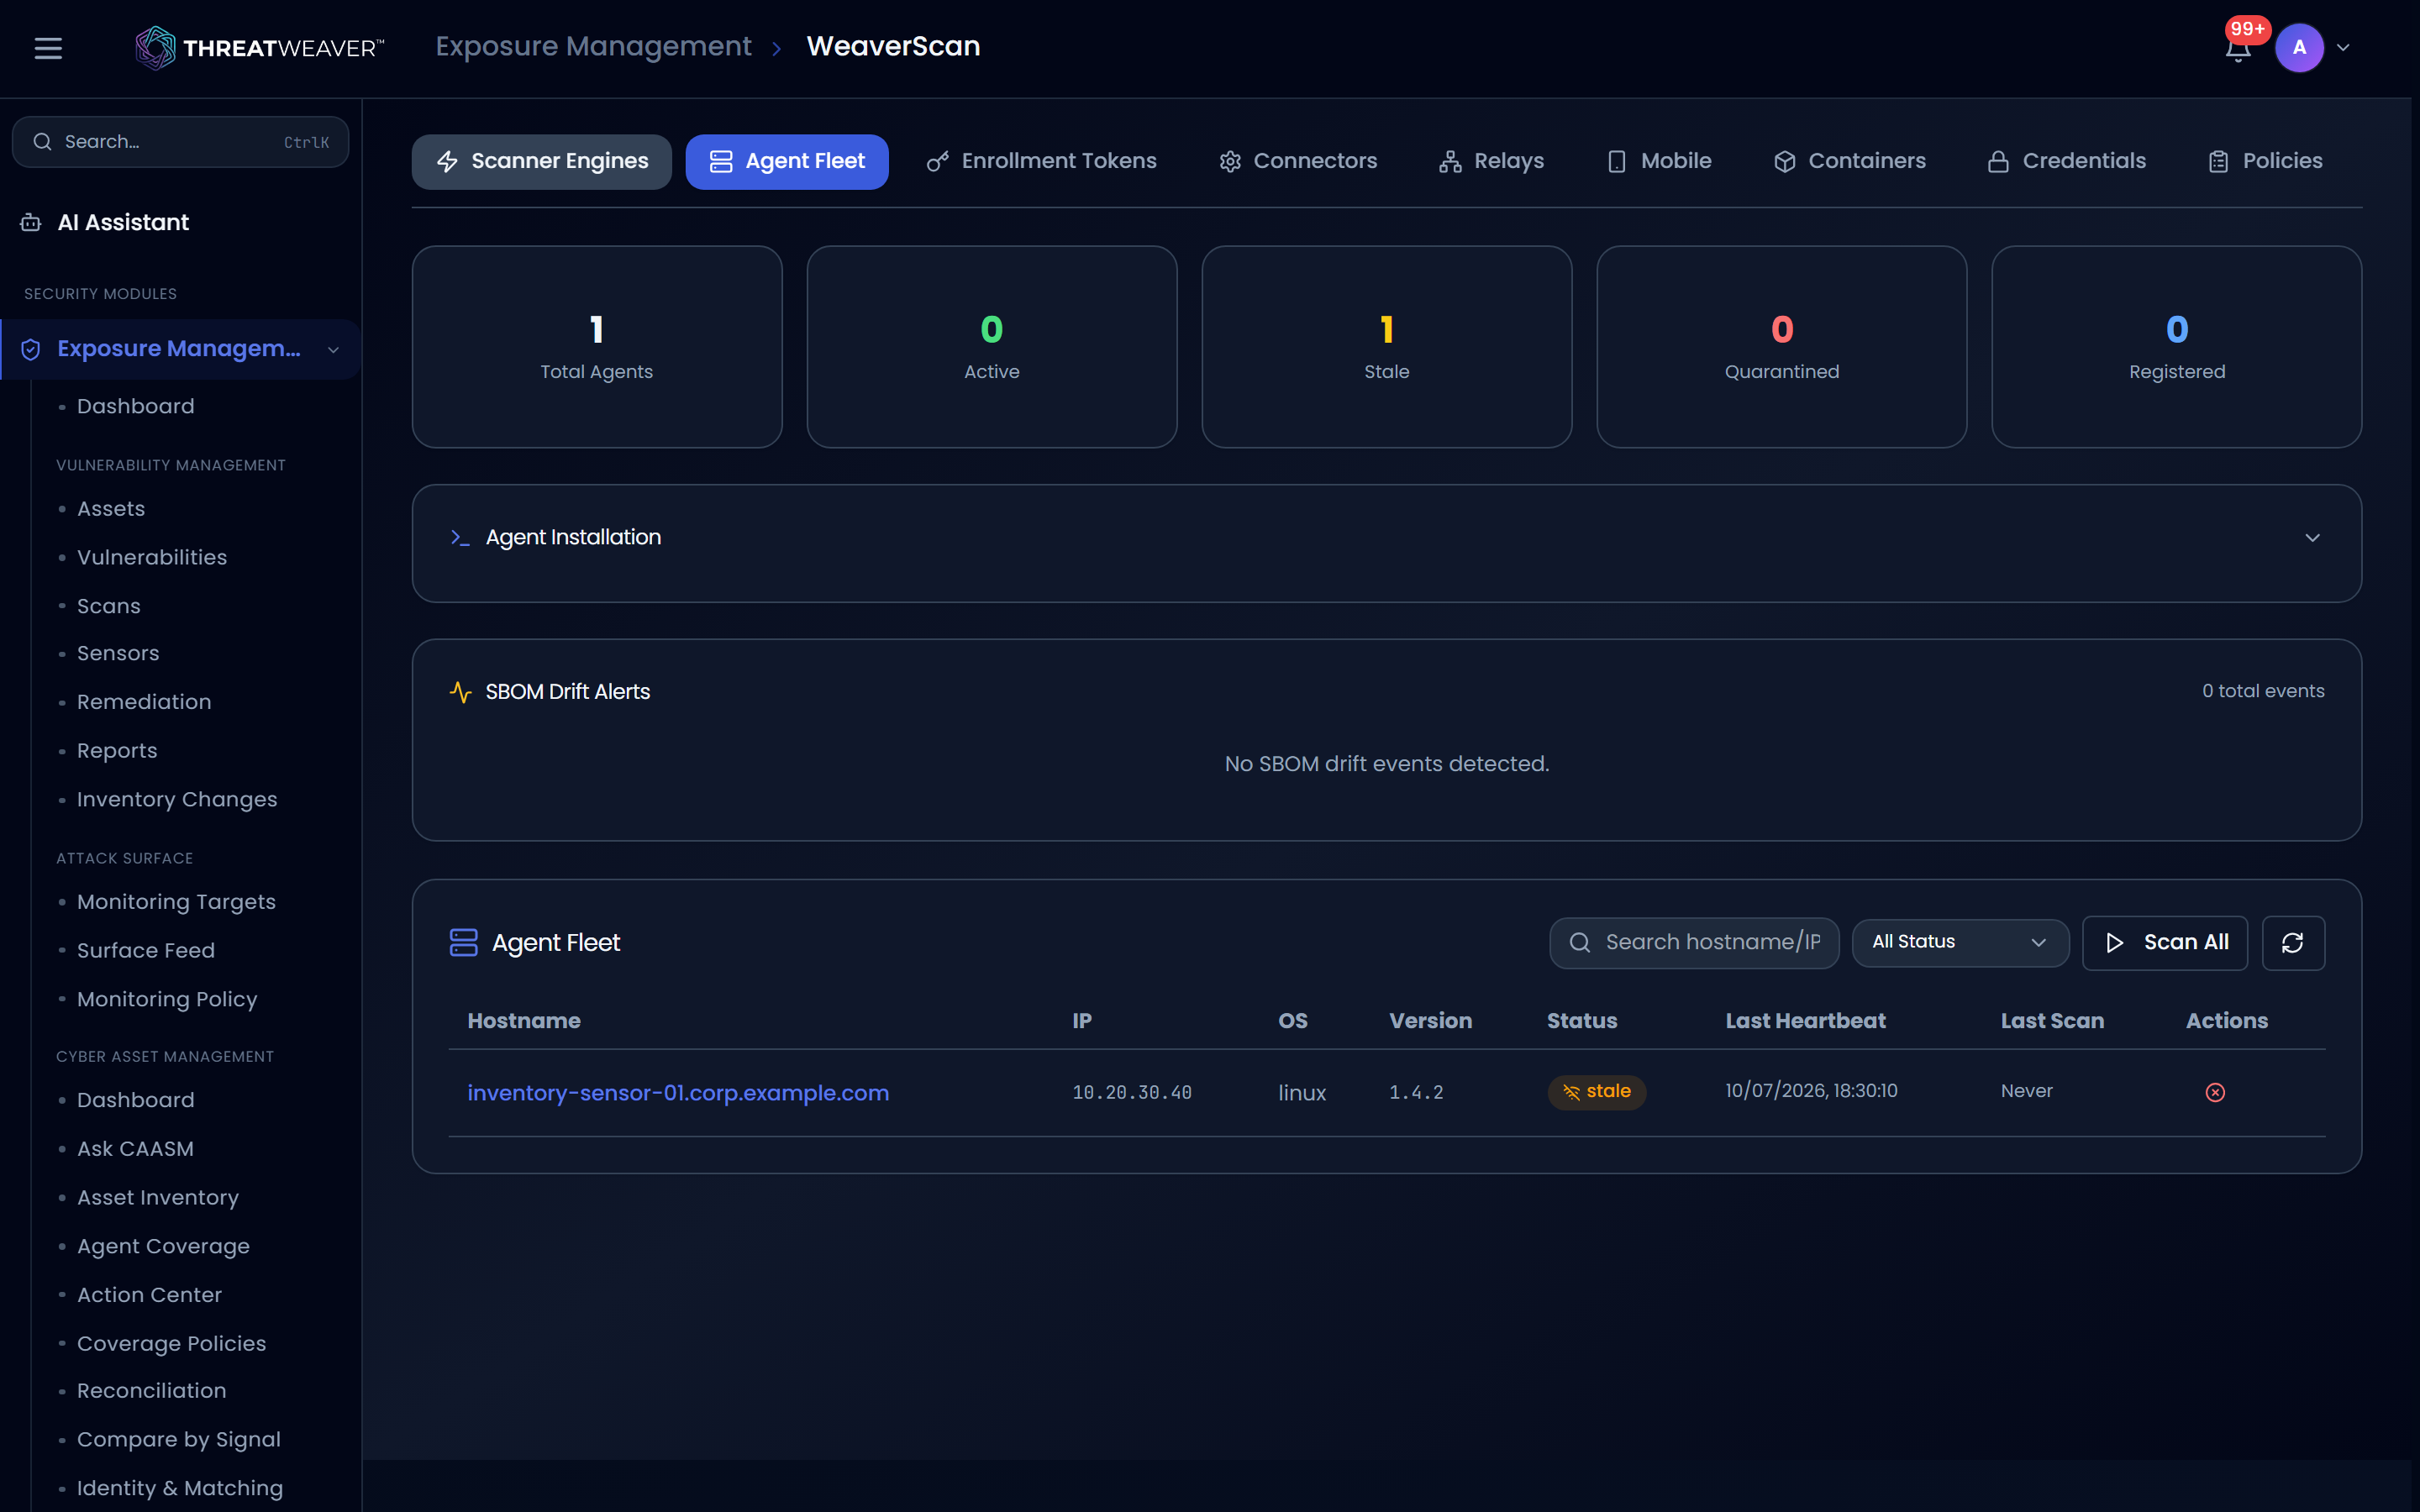
A KPI strip shows Total Agents, Active, Stale, Quarantined, and Registered counts.
Agent Installation
An expandable guide with per-platform (Linux, macOS, Windows) install instructions: download the agent, install it as a background service, point it at your ThreatWeaver server and paste an enrollment token (see Enrollment Tokens below), then start it. A Copy Commands button copies a condensed version of the steps.
The installation guide's commands point at a download location that isn't serving installers yet. Until that's available, build the agent from source instead. The guide notes this and gives the build command.
SBOM Drift Alerts
A small table of recent software changes detected on your agents: packages added, removed, upgraded, or downgraded, with the old and new version and when it happened. A caption below the table notes how many more events exist beyond the ones shown and refers you to Scanner Intelligence for full detail (not a clickable link).
The agent table
| Control | What it does |
|---|---|
| Search | Finds an agent by hostname or IP address. |
| Status filter | Narrows the list to Active, Stale, Registered, or Quarantined agents. |
| Scan All | Triggers a scan on every active agent. |
| Refresh | Reloads the fleet list. |
| Hostname (row) | Click to expand the agent's detail panel below the table. |
| Trigger scan (row, active agents only) | Queues a scan on that one agent. |
| Decommission (row) | Removes the agent from your fleet. |
Each agent shows its status as a badge (Active, Stale, Registered, or Quarantined) along with its OS, agent version, last heartbeat, and last scan time.
There's no confirmation step before an agent is decommissioned: double-check the row before you click.
The agent detail panel shows identifying detail for one agent: its ID, hardware identifiers, the asset it's linked to (or "Unlinked" if it hasn't been matched to one yet), its scan interval, current CPU and memory usage, a certificate fingerprint, and when it registered.
Enrollment Tokens
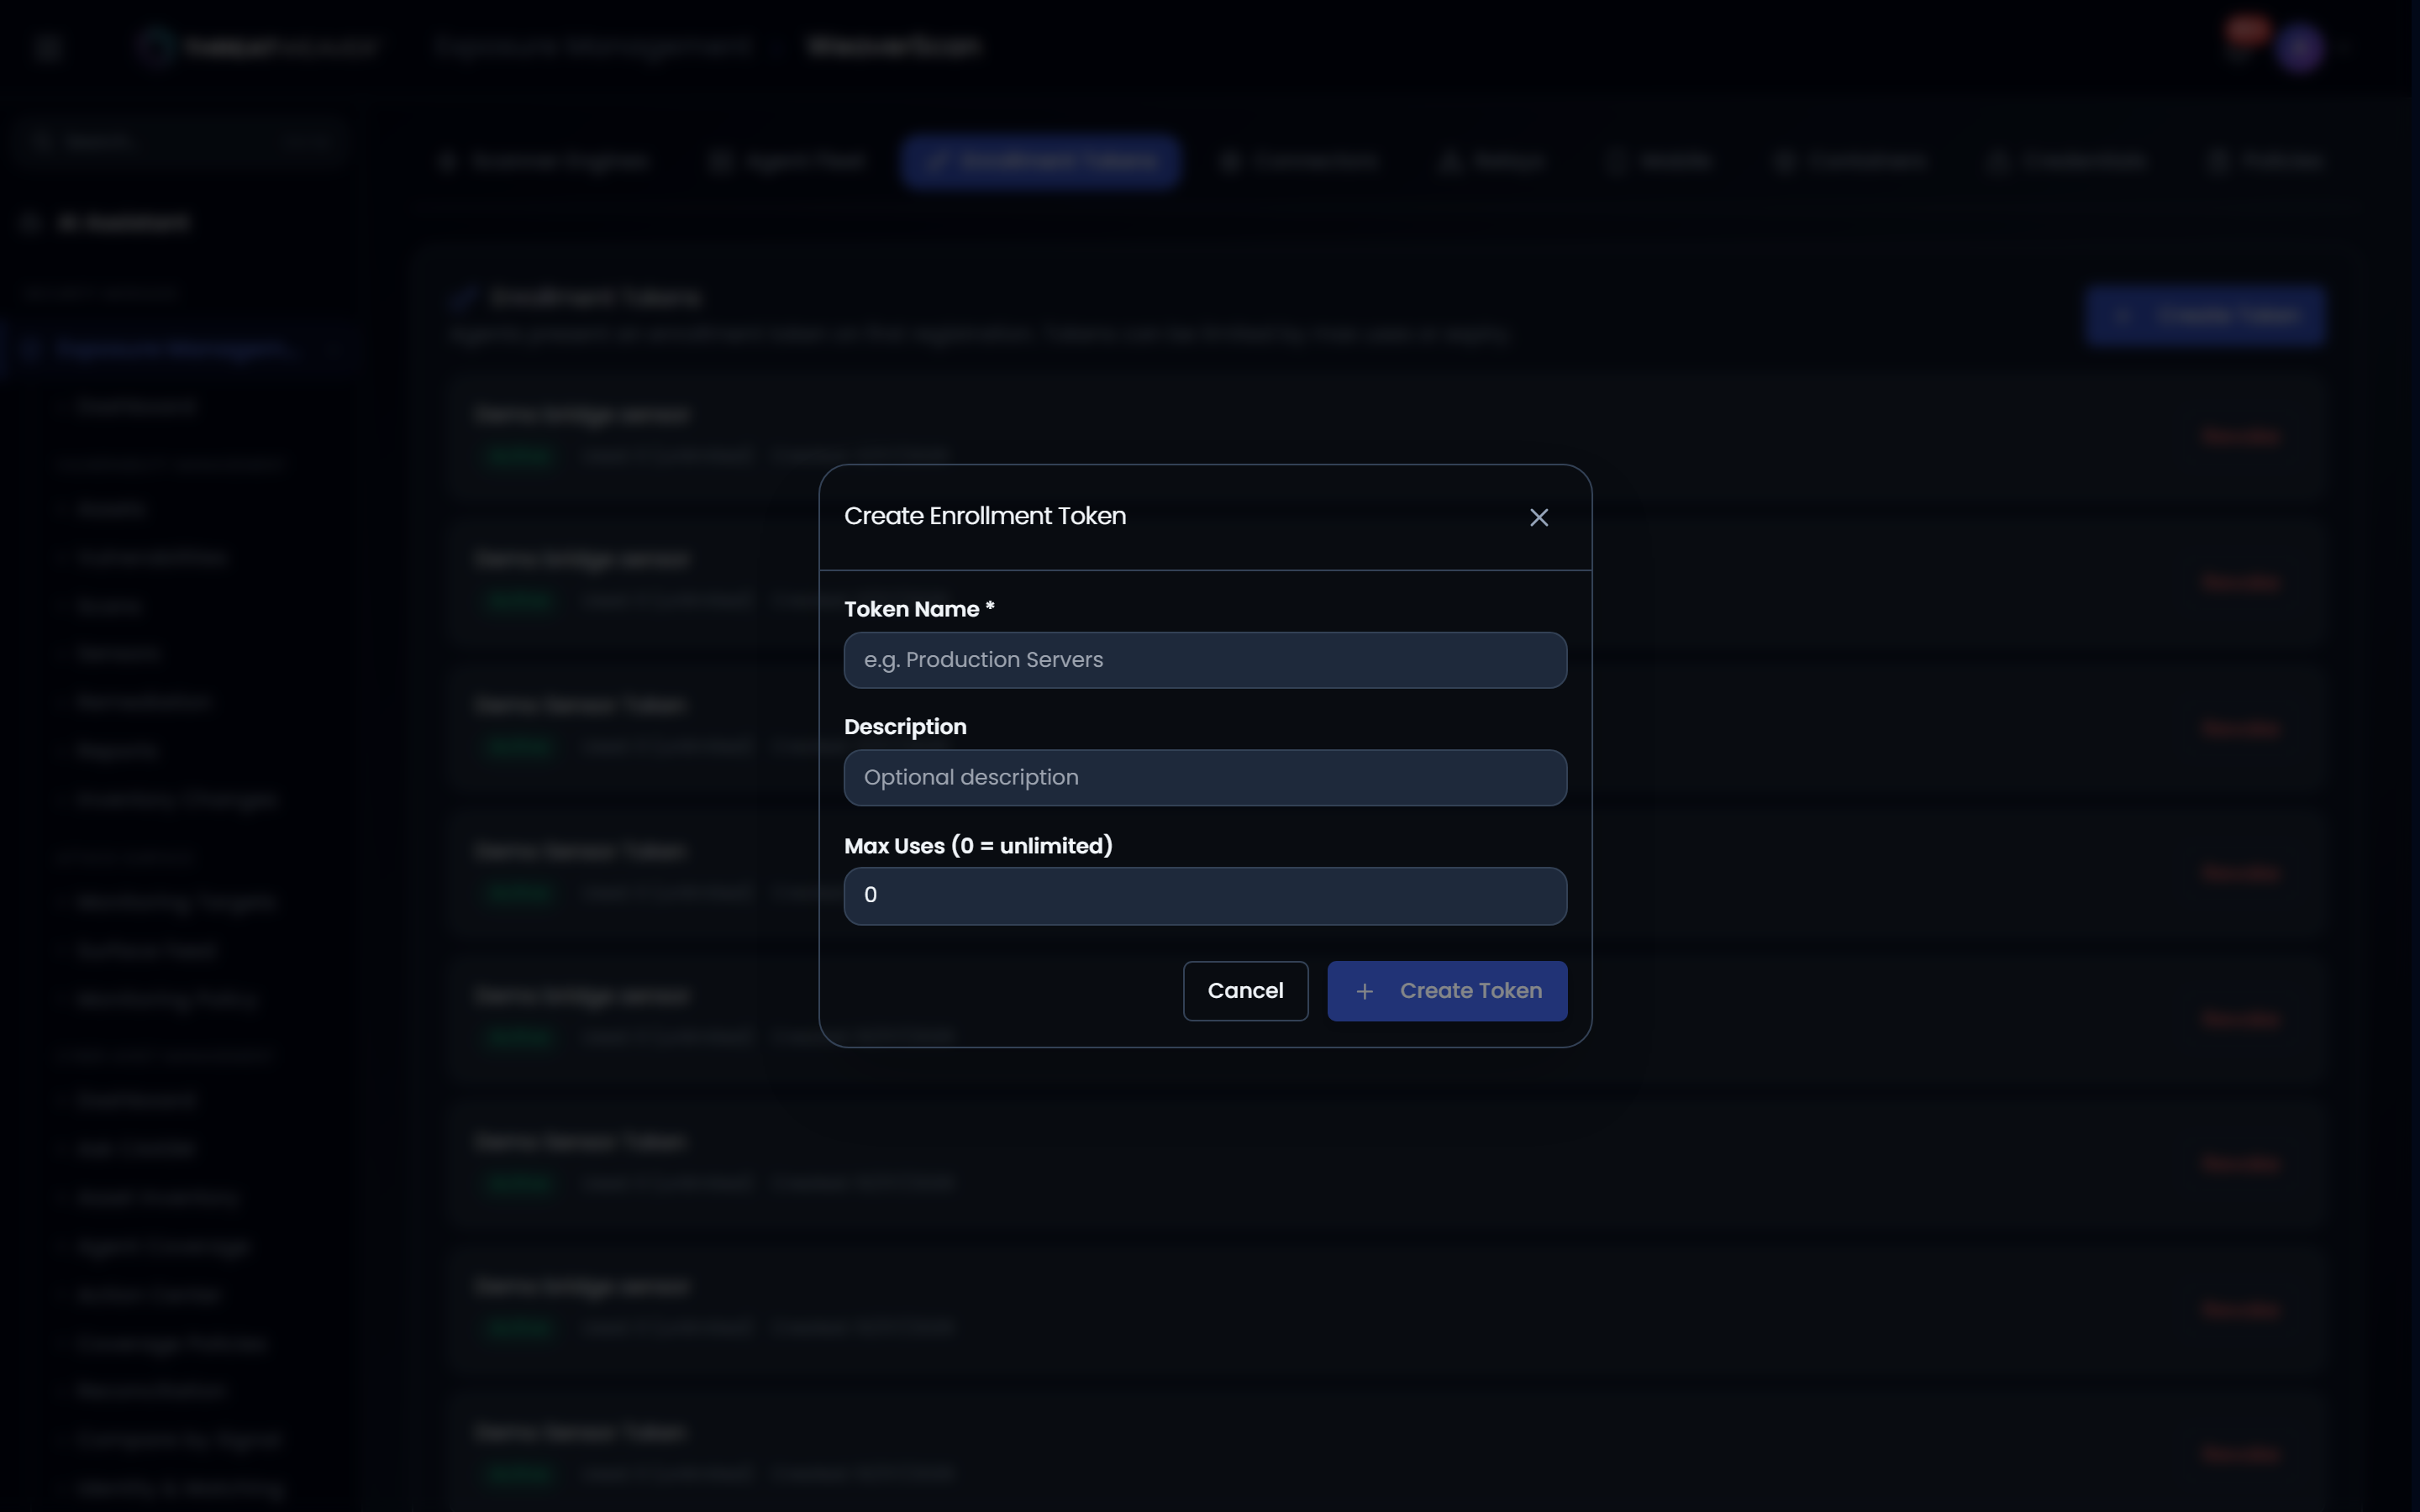
Tokens an agent presents the first time it registers with ThreatWeaver.
| Control | What it does |
|---|---|
| Create Token | Opens a form for a token Name, optional Description, and Max Uses (0 for unlimited). |
| Revoke | Immediately disables an active token. |
After you create a token, its raw value is shown one time in a Copy box. Save it immediately. ThreatWeaver doesn't display it again.
Each token in the list shows how many times it's been used (against its maximum, if any), whether it's expired, and when it was created.
Mobile, Containers, and Relays
Three read-only inventories built from what your agents report: there are no create/edit controls on these tabs.
| Tab | What it shows |
|---|---|
| Mobile | Registered mobile devices, their platform, and a compliance status (Compliant, Non-Compliant, or Jailbroken). |
| Containers | Detected containers, their image, running status, and vulnerability count. Click a row to expand a layer-by-layer breakdown of the image, including the packages in each layer and which ones carry a known vulnerability. |
| Relays | Relay nodes that let agents on segmented networks report back without reaching the main server directly, their online/offline status, and how many agents are connected through them. |
Connectors
Integrations with external vulnerability and security scanners, separate from the engine credentials on the Scanner Engines tab above.
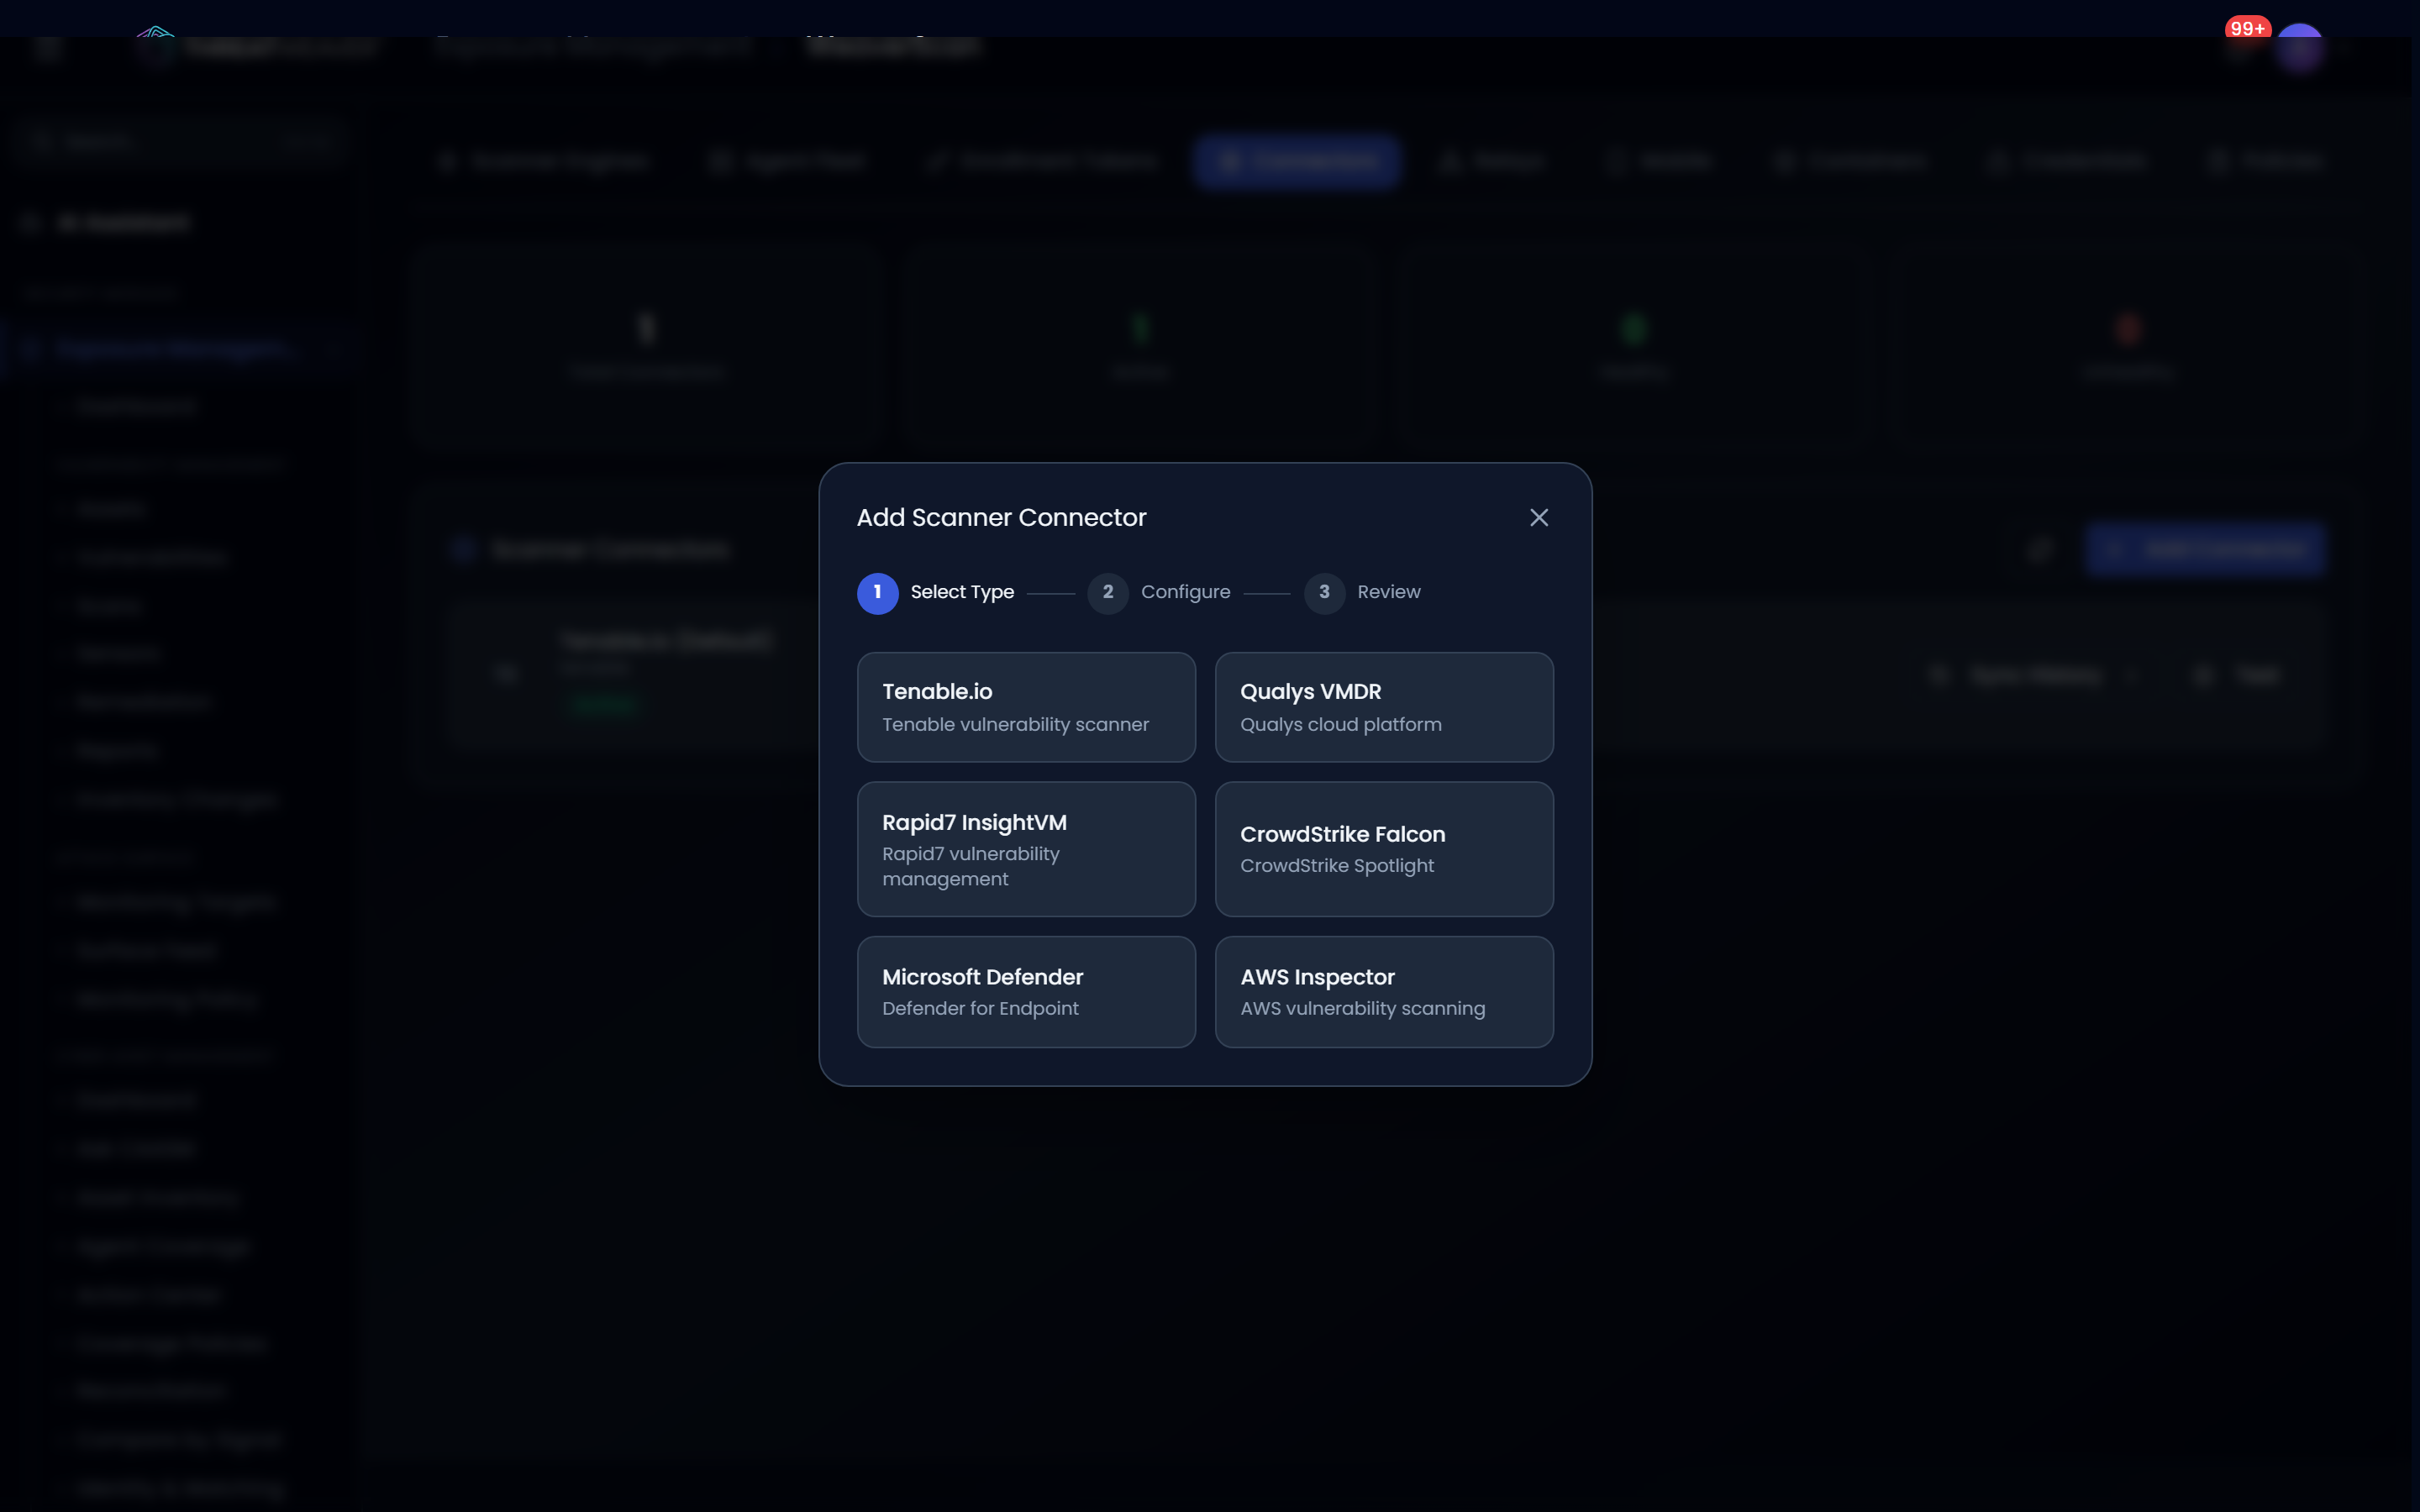
Each connector card shows a health badge (healthy, unhealthy, or unknown), whether it's active, and its latency and last-checked time.
| Control | What it does |
|---|---|
| Add Connector | Opens a 3-step wizard: choose a connector type, enter its connection details, then review and create it. Supported types include Tenable.io, Qualys VMDR, Rapid7 InsightVM, CrowdStrike Falcon, Microsoft Defender, and AWS Inspector. |
| Test | Checks the connector's connection and reports success or the failure reason. |
| Sync History | Expands a table of recent sync runs for that connector, with status, records synced, and any error detail. |
Credentials, Policies, Target Groups, Blackout Windows, and Report Settings
Five smaller configuration panels used when setting up and running scans.
| Panel | What you configure |
|---|---|
| Credentials | Saved authentication for scans: SSH with a password, SSH with a private key, SMB/Windows, SNMPv3, a database connection, or an API key. Each credential can be tested against a live connection. |
| Policies | Named scan policy templates: a name and description you can reference when configuring a scan. |
| Target Groups | A Static group of targets you paste in directly (IPs, CIDR ranges, or hostnames), or a Dynamic group whose rule-based membership is built from the new-scan screen instead of here. |
| Blackout Windows | A maintenance window (a name, a start and end time, and which days of the week it recurs on) during which scanning shouldn't run. |
| Report Settings | Report branding (a company name and logo URL) and which sections are included by default in generated reports. |
Unlike the other panels, Report Settings are stored on your device, not on your account, so they won't follow you to a different browser or computer.
Credentials, Policies, Target Groups, and Blackout Windows all delete without a confirmation step.
Tenant Overrides
Adjust how an individual WeaverScan detection check behaves for your workspace, without waiting for a catalog update: suppress a noisy result, override its severity, title, or remediation text, or scope the change to one asset group.
Filtering
| Control | What it does |
|---|---|
| Search | Matches a check ID, asset group, or reason. |
| Scope | All scopes, tenant-wide only, or asset-group scoped. |
| Asset Group | Narrows to overrides scoped to one asset group. |
| Suppressed | All, suppressed only, or not suppressed. |
| Status | Active and expired, active only, or expired only. |
Creating or editing an override
| Field | What it does |
|---|---|
| Check ID | The detection check to adjust. It's verified against the real catalog, and can't be changed once the override is created. |
| Asset group | Scopes the override to one asset group, or leave it tenant-wide to apply everywhere. |
| Suppressed | Hides every finding from this check. Requires a reason. |
| Early access | Opts your workspace in to beta content for this check. Doesn't change how the check is evaluated at scan time. |
| Severity override | Replaces the check's advisory severity. |
| Expires at | An optional date after which the override stops applying. |
| Title override / Remediation override | Replace the check's default title or remediation text. |
| Reason | Explains the override. Required when suppressing; recorded either way. |
Expired overrides stay listed (shown dimmed) but are ignored when scans run. Deleting an override (the one delete action on this screen with a confirmation step) removes it and is recorded in your audit log.
Common workflows
Workflow: enroll a new agent
- Open Enrollment Tokens and click Create Token. Give it a name and, optionally, a maximum number of uses.
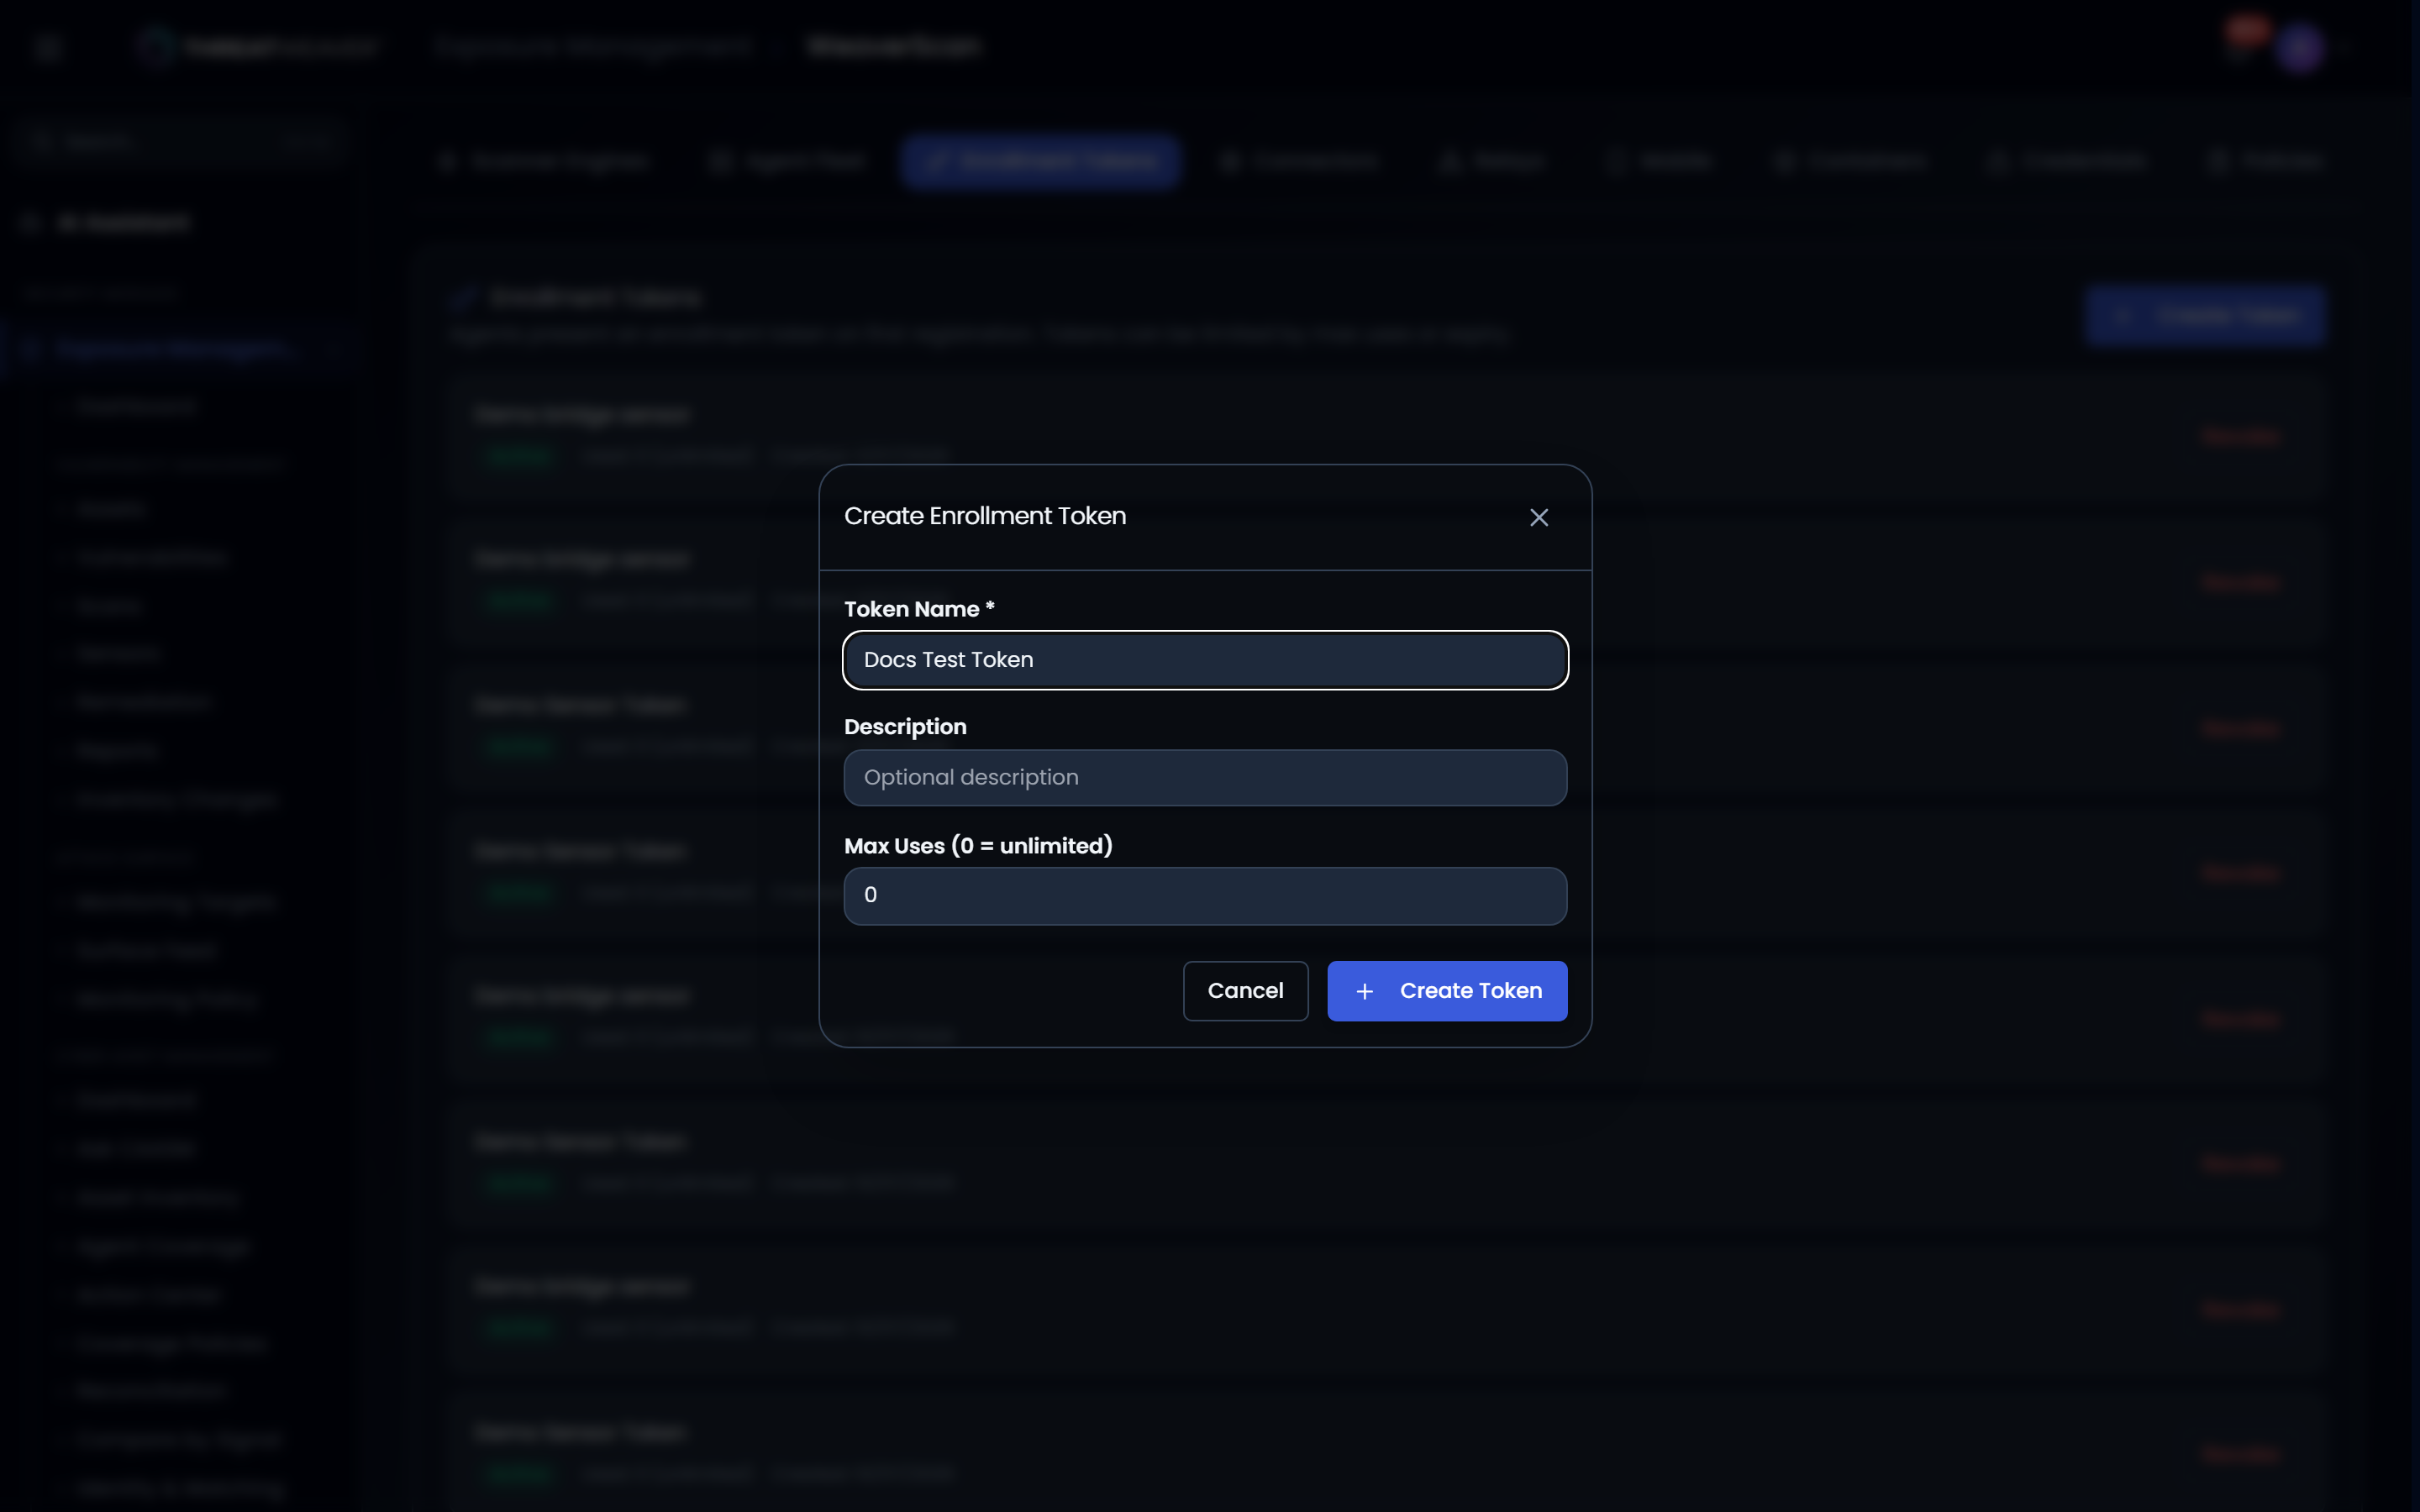
- Copy the token value shown. It won't be shown again.
- Switch to Agent Fleet, expand Agent Installation, and follow the steps for your platform, pasting in the token when prompted.
- Once the agent starts, return to Agent Fleet: it appears in the table once it sends its first heartbeat.
Workflow: suppress a noisy detection check
- Open Tenant Overrides and click to create a new override.
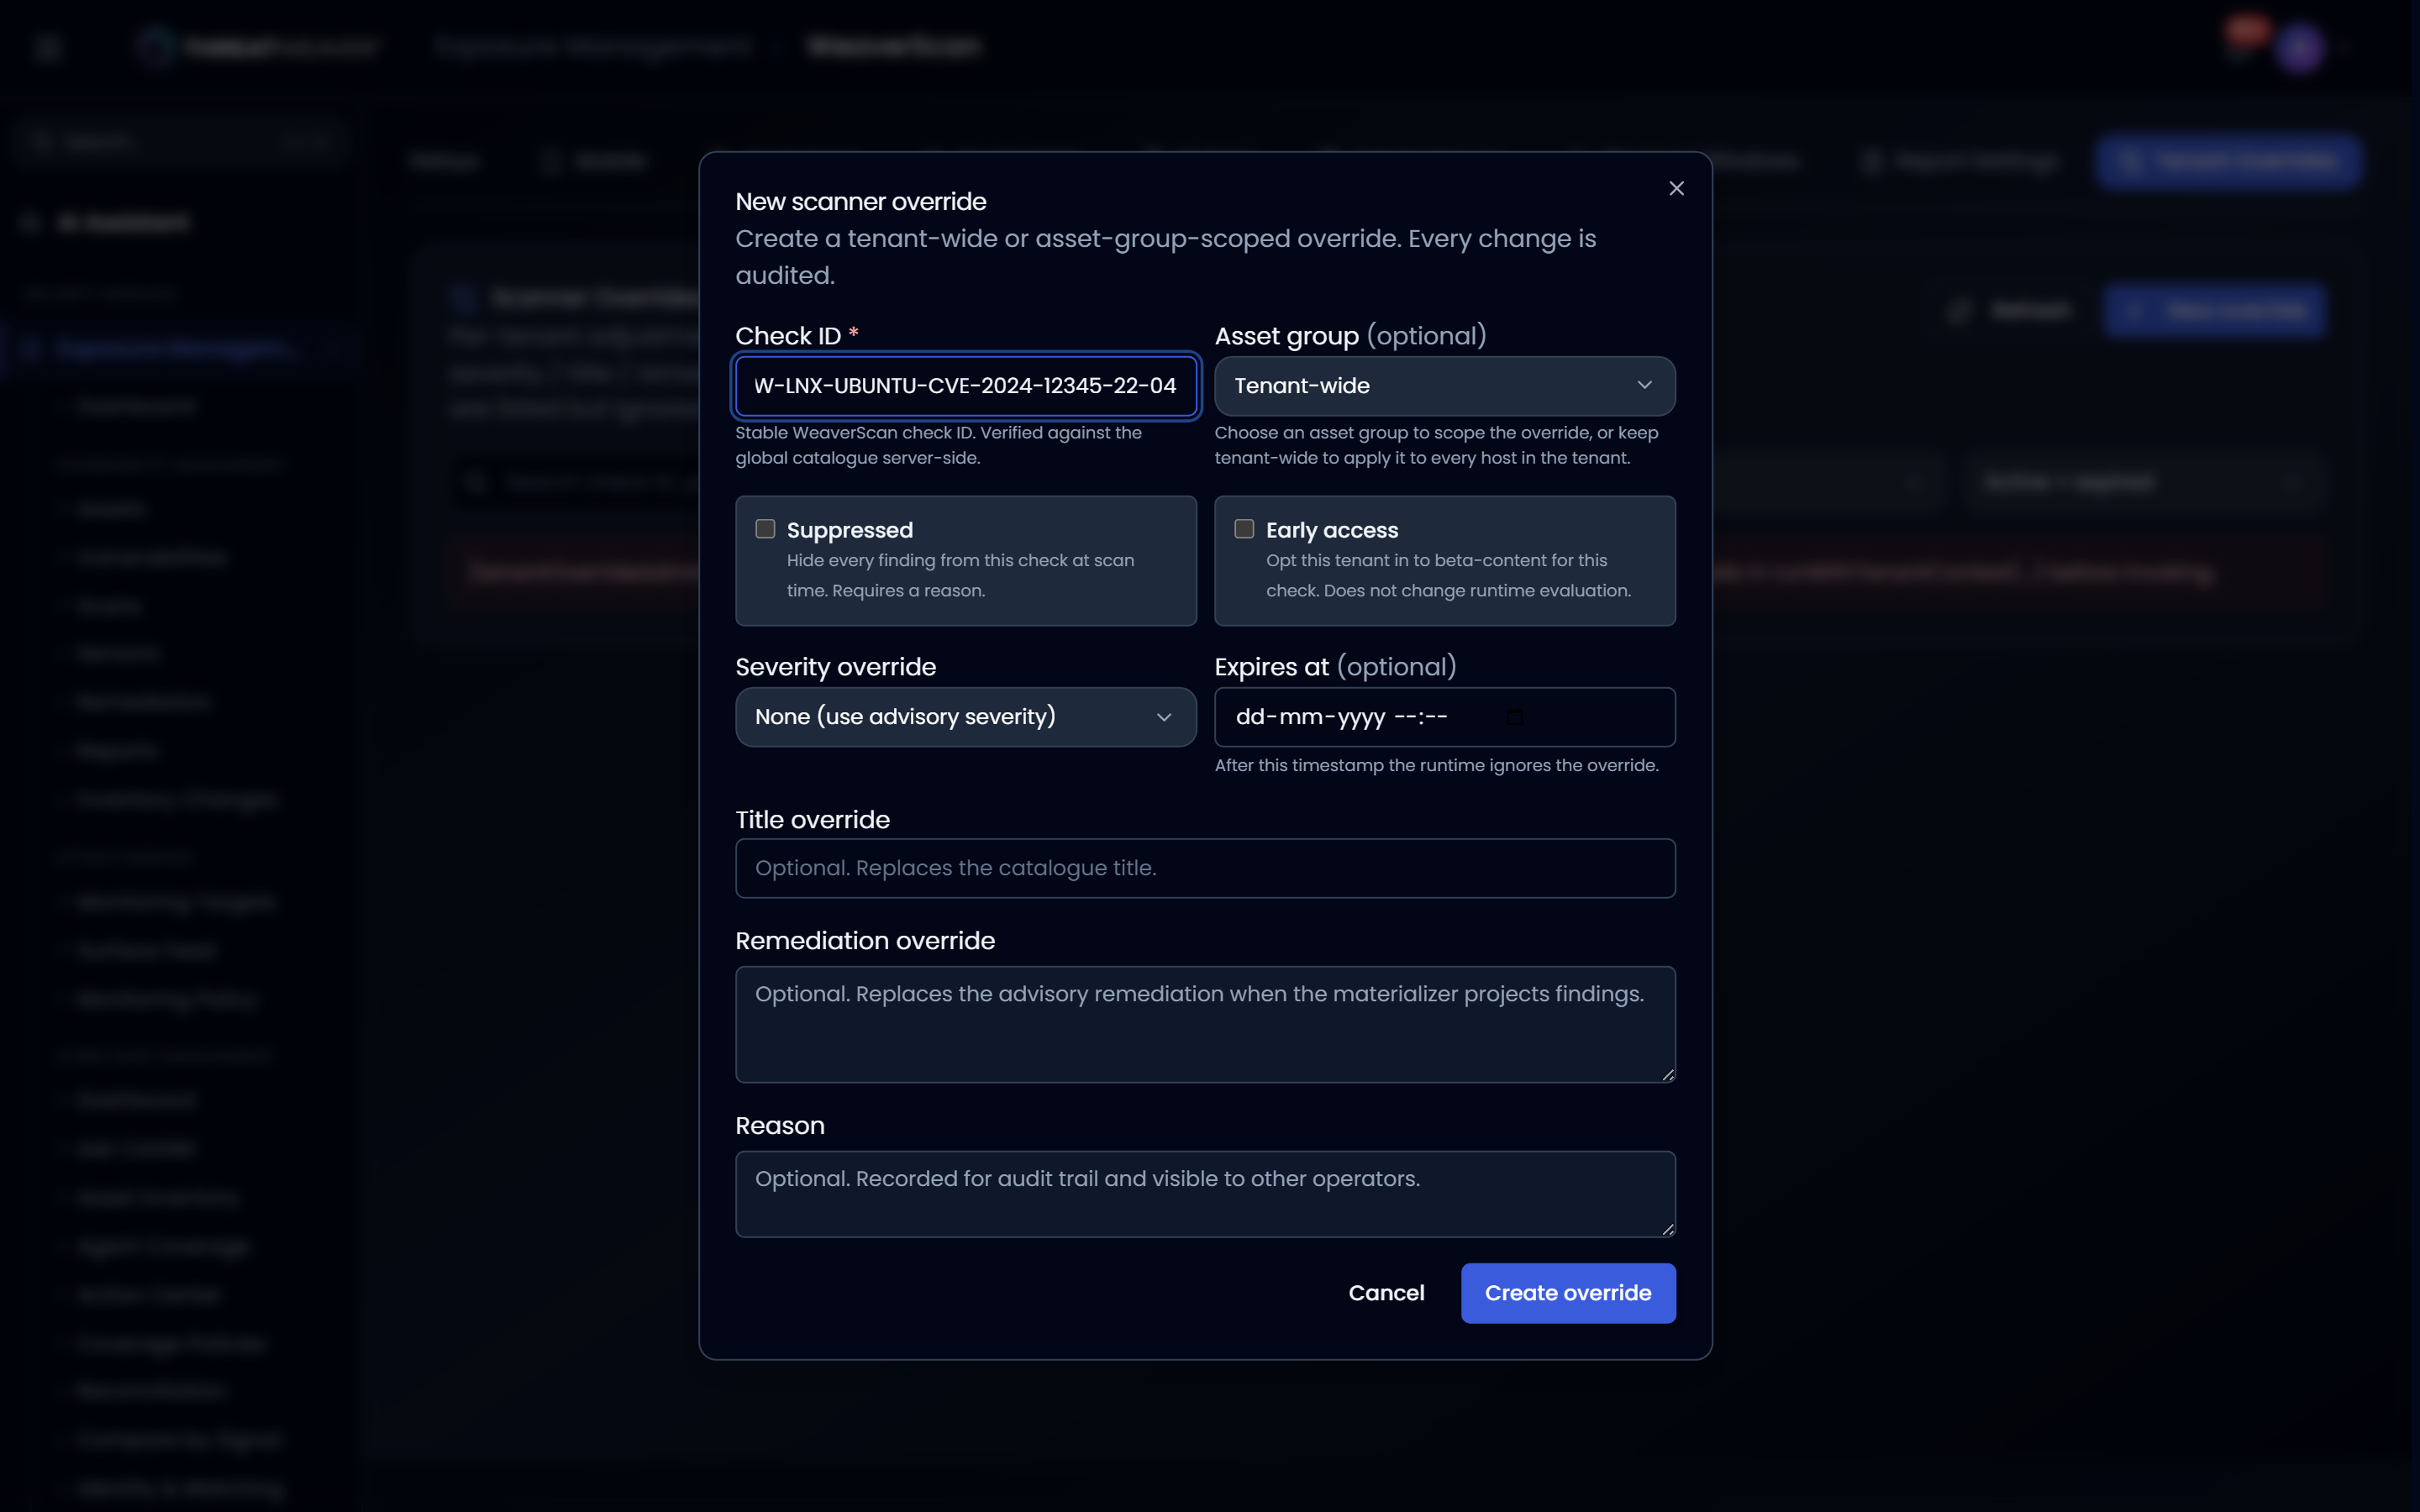
- Enter the Check ID you want to adjust, and optionally scope it to a single asset group instead of your whole workspace.
- Turn on Suppressed and enter a Reason (it's required).
- Save. The check no longer produces findings within the scope you set, and the change appears in Audit Log.